Spectroscopy
At first glance, an EELS experiment may seem quite daunting because of the wealth of information generated by the technique. However, the actual spectroscopy workflow is relatively simple, as seen here.
A similar workflow applies to DualEELS™ data acquisition: DualEELS Workflow.
Proceed to the next pages for step-by-step workflow instructions when you use DigitalMicrograph® 3 software.
Locate the Beam
-
 Locate a hole in the sample at any magnification in the normal magnification mode (between 2k – 200k).
 -
Illuminate the center 2 – 10 cm of the TEM screen.
-
Clear the beam path to the filter (retract unused detectors and raise the viewing screen).
-
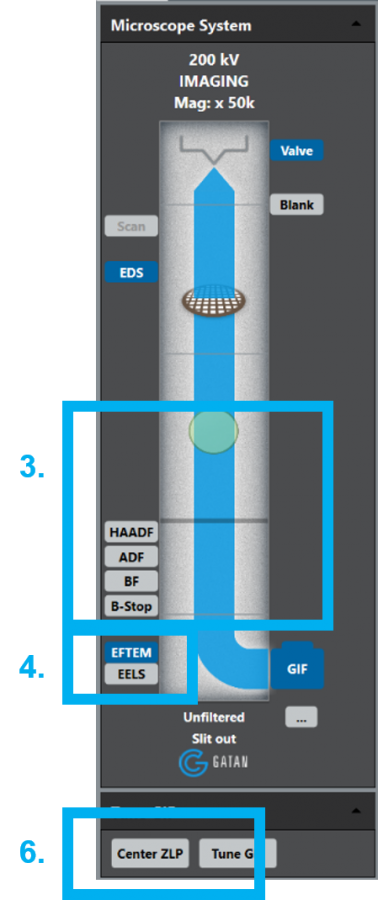
Select EELS mode in the Microscope System palette.
- Finally, click on the Center ZLP button in the Microscope System palette to align the beam.
Focus the Spectrometer
-
 Ensure that the spectrum contains adequate signal as well as some reasonably sharp features that the alignment routine can use to focus (e.g., zero-loss peak or a low energy core-loss edge).
 -
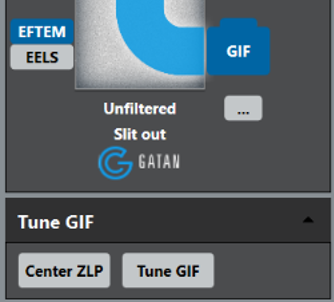
Press the Tune GIF button to automatically focus the spectrometer. -
Select an EELS Focus option to open a new Tuning dialog box. -
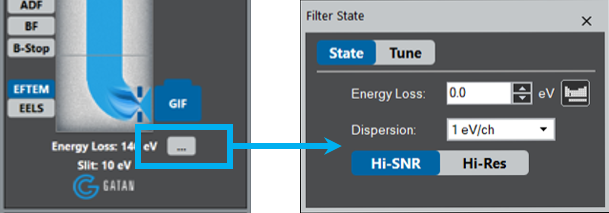
To manually focus, click (...) and adjust the Energy Loss and Dispersion in the Filter State window.


Acquire a Spectrum
-
Find the general region of interest at low magnification; once located, increase the magnification. Ensure that you choose an area with suitable thickness. A t/λ thickness map is ideal for this determination.

-
Reduce the spot size and condenser aperture to typical values for microanalysis.
-
Put the beam on the feature of interest; select a region that appears highly electron transparent.
-
Select the diffraction mode on the TEM, then set the camera length to 5 – 20 cm to give a collection angle in the region of ~20 mrad.
-
Make sure the center spot (disc) is in the center of the screen.
-
Lift the screen, then click the View button on the EELS palette to start a continuous view of the low-loss spectrum.
-
Click on the EELS status text to control the dispersion, aperture, and energy offset. You can choose the energy offset by an element from the periodic table icon.

Note: Generally choose the smallest dispersion (largest eV/ch value) that still gives the required energy resolution. Assume at least 3 channels are needed to define the energy resolution (e.g., 0.5 eV/ch will yield at best 0.5 x 3 = 1.5 eV resolution). For systems with adjustable apertures, choose Hi-SNR (largest aperture) for mapping and general EELS, and choose Hi-Res for low-loss EELS and ELNES studies where the best energy resolution is needed.
-
Select Auto in the Exposure field of the EELS palette to use the auto exposure function.

-
If you prefer manual mode, disable Auto and enter the Exposure time. Alternately, with the live EELS window frontmost, hitting the up/down arrow keys will double/half the current Exposure time.
-
Choose among the four EELS detector settings (SNR, View, HDR, User) as needed for the experiment.
-
SNR uses the lowest noise settings and is ideal for weak signals
-
View provides a fast refresh of the spectrum with a good dynamic range
-
HDR is preferred when viewing strong signals and delivers the cleanest spectra
-
Enables custom camera settings for the user; click on the setup icon to access and change the user settings
-
Note: View and Capture use the same camera settings.
-
Use the Align ZLP button to adjust the ZLP to 0 eV.

-
Select the Thickness button in the EELS Processing palette to estimate the thickness of your region of interest.

Set Energy Range
The spectrometer can be set to give a variable energy range depending on the experimental requirements. To change the energy range:
-
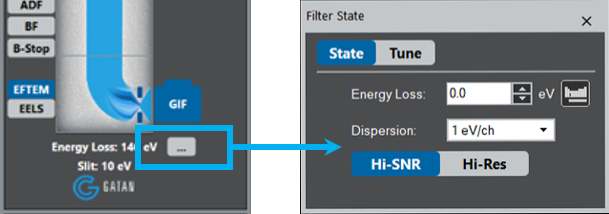
Set the energy range using the Dispersion setting that you can access via the (...) option in the control region of the Microscope System palette.
-
Use a small eV/ch setting (large dispersion) for detailed spectra around an edge or the ZLP.
-
Use a large eV/ch setting (small dispersion) microanalysis or mapping.
-
-
 If the exposure is set to Auto, the exposure time will automatically adjust as the energy loss changes. This is very useful when going from a high to low energy offset. The auto feature will predict the large increase in intensity and adjust accordingly.
Optimize Spectrum
When you look at a spectrum for the first time, it may appear noisy. This is typically the result of collecting too few electrons and the spectrum has excessive shot noise. A common reason is the exposure time may be small due to settings from the previous spectrum (e.g., the core-loss was very bright). Increase the exposure time until the detector starts to saturate. Auto exposure mode is recommended.

To record a high quality spectrum, follow the steps below.
-
 From the EELS palette, choose the correct camera setting. HDR is best for most single spectrum acquisitions where speed is not a concern. The signal-to-noise ratio (SNR) will give the lowest readout noise, however.
 -
Within the EELS Acquire Setup dialog, on the Options tab, check the Auto-align Summed Spectra box to sum together many short exposures to improve the energy resolution. This will have limited effect at low energy resolution dispersion but can sharpen the ZLP and low-loss spectra at high dispersion. Apply HQ dark correction should always be enabled and will greatly reduce the noise in summed spectra and STEM spectrum images.
-
From the EELS pallet, choose an appropriate Sum Time. This will be the total live time the spectrum is integrated. If the Auto feature is enabled for capture, the single readout exposure with be determined upon pressing the capture button; otherwise, the view exposure will be used. The acquisition will continue until the live time reached. If sufficient SNR is reached before the live time is reached, the operator can press the Capture again button to finish the acquisition.

 Once you increase in the integration time, there will be a notable improvement in the spectrum noise. The system is now ready to run an EELS quantification.
Noise sources
Shot noise
There are various sources of noise that commonly impact an experiment’s SNR. One source is shot noise, which results from the inherent statistical variation in the arrival rate of electrons on the detector.
Shot noise = \(N{_{E}}^{\frac{1}{2}}\) where \(N_{E}\) is the expected number of electrons detected.
To reduce shot noise, your only recourse is to acquire more electrons, consider:
-
Increasing the beam current
-
Increasing exposure – Stop when the CCD saturates
-
Summing frames
Readout noise
This usually displays as a fixed noise value each time a pixel is readout. This noise is inherent to the process of converting CCD charge carriers into a voltage signal, as well as the subsequent processing and analog-to-digital conversion. For strong signals, this noise is insignificant but sets a noise floor or fog level for weak signals. To mitigate this effect, increase the binning so fewer pixels are readout.
Dark noise
This minor contributor to noise arises from statistical variation in the number of electrons thermally generated within the silicon structure of the CCD. Verify the detector is cooled to help avoid this source of the noise.
Poor gain correction
Occasionally you will encounter fixed patterns in the spectra that may be due to small errors in the gain correction. When this type of redundancy occurs, consider these variations to your system setup.
-
Collect a fresh gain reference
-
Set Binning to a lower value
DualEELS Workflow
Dual-range EELS (DualEELS™) is an acquisition mode that allows you to acquire two parts of the electron energy loss spectrum in a fast, sequential manner with independent energy ranges and exposure times. Typically, you use this mode to acquire a core-loss spectrum and the accompanying low-loss spectrum. Hence, it allows you to perform advanced EELS analyses, such as quantification or plural scattering deconvolution.
To acquire dual-range EELS, select Dual in the EELS palette.
Conceptually, the DualEELS acquisition mode is very similar to the Single Range mode, with the addition of a second exposure time and energy offset.
-
Energy – Specifies the energy loss offset of the low- and high-loss spectra.
-
Exposure – Indicates the low-loss and high-loss exposures; the sum of these, plus a very small fixed overhead to accommodate the change in state from high- to low-loss, gives the total frame exposure of the camera.
Like EELS mode, the View button starts a continuous dual spectrum view during spectrometer setup and specimen evaluation. During DualEELS mode, it will display both the low- and high-loss live spectra. Once you optimize your parameters, select the Acquire button to capture the DualEELS cumulative spectrum.